

How do you actually apply gel polish?
Applying gel polish to your own nails is not very difficult, but it does take some practice in the beginning. Where do you start and what do you need?

Before you start your manicure, it is useful to gather all the supplies you need.
- A UV/LED lamp/nail lamp
- A nail file
- A goat's leg
- Nail wipes
- A degreaser/acetone
- Base coat
- Gel polish color
- Top coat
- Cuticle oil
Do you have everything ready? Then we can start.
First, file your nails into the desired shape. Push back your cuticles a bit with a cuticle stick. Then roughen up the top of your nails with a coarse file. You do this so that the gel polish adheres better to your nail and you can enjoy it longer. Now clean your nails with a degreaser. Put a little degreaser or acetone on a nail wipe and also clean the edges well. Make sure that the nails are completely free of dust and fluff.

Now your nails are completely ready to be applied with gel polish.
Start with a (rubber) base coat. Apply a layer and make sure you keep about 1 mm distance from your cuticles. When applying the base coat (and the subsequent layers), also take the front of the nail into account. We also call this sealing the nail. This prevents air from getting under the gel polish, and it also stays on much better. An important step. Then let this layer harden under the UV/lamp.
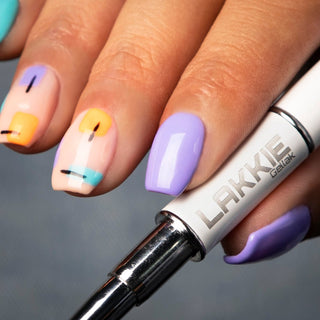
Now apply a thin layer of the gel polish color of your choice. Also take into account the distance of the cuticles and that you seal the front well. Then let this layer harden again under the nail lamp. Repeat this step until you have the perfect coverage.
Please note that you apply really thin layers, instead of very thick layers. Thick layers of gel polish often quickly become ugly and can also start to ripple, a waste of all the work you put into it.
Are you satisfied with the result? Then apply the no wipe topcoat and let this layer of gel polish harden under the uv/led lamp. Then apply some cuticle oil and massage it in well.
It wasn’t too bad, right? And don’t forget, practice makes perfect!
You might also like to read: